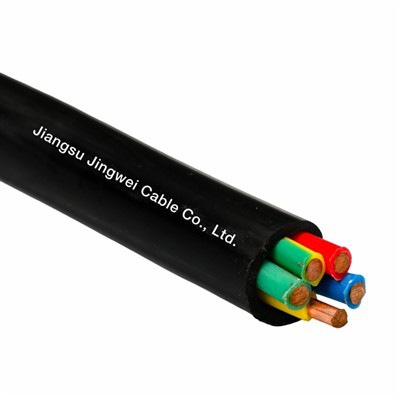
Hey there! I'm a supplier of Aluminium Alloy Cable, and I'm here to share some tips on how to install these cables correctly. Aluminium alloy cables are a great choice for many applications due to their lightweight, corrosion resistance, and good conductivity. But to make the most of them, proper installation is key.
Pre - installation Checks
Before you start installing the Aluminium Alloy Cable, there are a few things you need to do. First, check the cable for any visible damage. Look for cuts, abrasions, or kinks in the cable sheath. If you find any damage, it's best to replace the cable. You don't want to use a damaged cable as it can lead to electrical problems down the road.
Next, measure the length of the cable you need. Make sure you have enough cable to reach from the power source to the destination without any tight bends or excessive slack. You can use a measuring tape for this. If you're not sure about the length, it's better to get a bit more cable than you think you'll need.
Also, check the environment where you'll be installing the cable. If it's an outdoor area, make sure the cable is suitable for outdoor use. Some cables are designed to withstand harsh weather conditions, while others are better for indoor use. For outdoor underground installations, you can consider using Outdoor Underground Wire.
Tools and Materials
To install the Aluminium Alloy Cable, you'll need some basic tools. A good pair of wire cutters is essential for cutting the cable to the right length. You'll also need a stripper to remove the insulation from the ends of the cable. A screwdriver is useful for tightening the cable connectors.
In addition to the tools, you'll need cable connectors. Make sure the connectors are compatible with the Aluminium Alloy Cable. There are different types of connectors available, such as compression connectors and screw - type connectors. Choose the one that suits your installation needs.
Installation Steps
Step 1: Planning the Route
Plan the route for the cable carefully. Avoid areas where the cable might be exposed to mechanical damage, such as near heavy machinery or sharp objects. If you're running the cable through walls or ceilings, make sure to use proper cable channels or conduits. This will protect the cable and also make it look neater.


Step 2: Cutting the Cable
Use the wire cutters to cut the cable to the desired length. Make sure the cut is clean and straight. After cutting, use the stripper to remove about 1 - 2 inches of insulation from the ends of the cable. Be careful not to damage the conductors inside.
Step 3: Connecting the Cable
Attach the cable connectors to the ends of the cable. If you're using compression connectors, use a crimping tool to secure the connector to the cable. For screw - type connectors, tighten the screws firmly to ensure a good electrical connection. Make sure the connectors are properly tightened to prevent any loose connections, which can cause overheating and electrical failures.
Step 4: Securing the Cable
Once the cable is connected, secure it in place. You can use cable clips or ties to hold the cable along the planned route. Make sure the cable is not sagging or hanging loosely. If you're installing the cable in a conduit, feed the cable through the conduit carefully.
Step 5: Testing the Installation
After the installation is complete, test the cable to make sure it's working properly. Use a multimeter to check the continuity and insulation resistance of the cable. If the readings are not within the acceptable range, check the connections and look for any possible problems.
Common Mistakes to Avoid
One common mistake is using the wrong type of connectors. As I mentioned earlier, make sure the connectors are compatible with the Aluminium Alloy Cable. Another mistake is not tightening the connectors properly. Loose connections can lead to arcing and overheating, which can be dangerous.
Also, don't bend the cable too sharply. Aluminium alloy cables have a minimum bending radius, and exceeding this radius can damage the cable and affect its performance.
Advantages of Aluminium Alloy Cable
Aluminium alloy cables have several advantages. They are lighter than copper cables, which makes them easier to handle and install. They also have good corrosion resistance, which is especially important in outdoor or humid environments.
In addition, Aluminium Alloy Cable is a cost - effective option. It offers a good balance between performance and price, making it a popular choice for many electrical applications. If you're looking for a reliable and affordable cable, you might also be interested in Thick Power Cable and Electrical Power Wire.
Conclusion
Installing Aluminium Alloy Cable correctly is crucial for its performance and safety. By following the steps I've outlined above and avoiding common mistakes, you can ensure a successful installation. If you have any questions or need more information about our Aluminium Alloy Cable, feel free to reach out. We're always here to help you with your cable needs. Whether you're working on a small DIY project or a large - scale industrial installation, our cables are designed to meet your requirements. So, don't hesitate to contact us for a quote and start your next project with confidence.
References
- Electrical Installation Handbook
- Aluminium Cable Installation Guidelines